How To Net Delivery Jeoss Demo.
The idea is being able to perform a network delivered installation. The install can be performed on a real PC or in a virtual environment (i.e. VMware). On this how-to the installation will be performed on a Headless and CD-less target completely controlled by a SSH ePuTTY terminal.
NOTE: Please read Jeoss Install Manual and Jeoss Demo Install Manual before reading this how-to
Software required:
Jeoss miniISO
Serva32 / Serva64 1.2 B3 or higher
ePuTTY32 / ePuTTY32
1- The hardware lay-out is very simple;
- Server PC running Serva32 offers the Jeoss Install miniISO image + PXE Services
- Target PC net boots (PXE Client) and receives a net delivered. Jeoss install
- The Install process is controlled by a remote SSH ePuTTY terminal
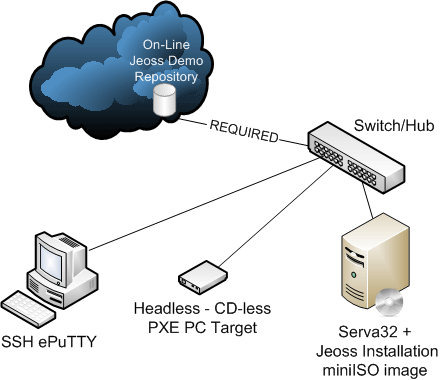
2- The Jeoss miniISO install image can be downloaded and burned on a CD or just mounted using Daemon Tools. For the purposes of this How-to let's consider it is available as drive G: on the Serva server.
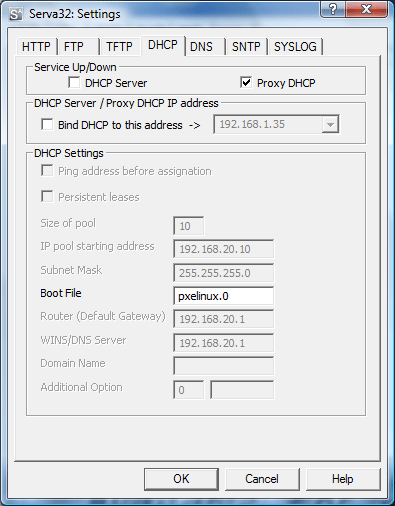
3-Let's configure Serva32. The IPs will be assigned by the Internet Modem/Router DHCP service and Serva32 is configured as Proxy Server. The Proxy Server delegate the IP assignment task and only supply the part of the PXE protocol related to the location of the pxelinux.0 booting file.
4- Let's boot the PXE enabled Target PC monitoring Serva's Log until we see when the Internet Modem/Router assigns the Target's IP and the TFTP traffic begins. We will see something like:
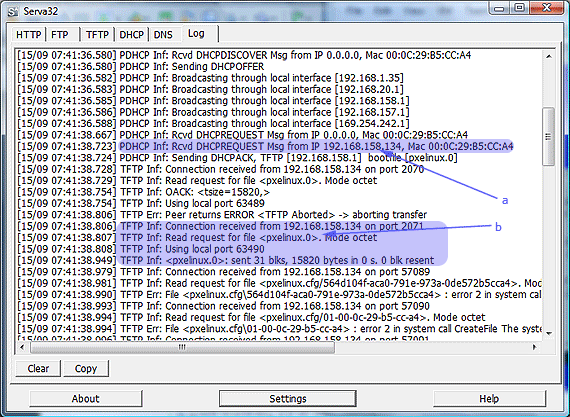
a) Shows the Serva receiving a Target request using its just assigned IP 192.168.158.134. As our target is headless we are blindfolded; we will need this IP address to start our SSH ePuTTY session.
b) Shows how the Target starts requiring the PXE booting components to Serva's TFTP server.
Now we have to just wait until the Jeoss install finishes booting-up and loading the default SSH control services. This can take about 3 minutes after we see the new target's IP on Serva's Log.
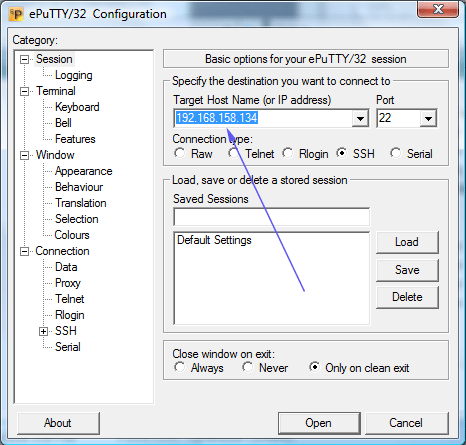
5- Lets start the SSH ePuTTY session pointing to the Target PC
6- After accepting the new SSH certificate Jeoss Install will invite us to login:
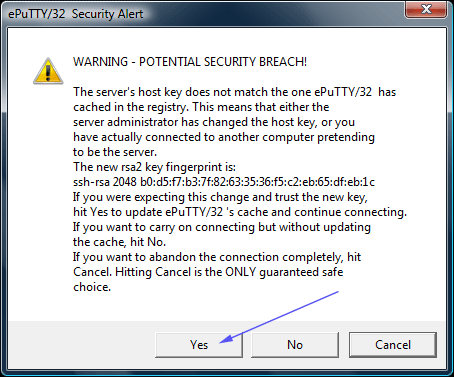
login as: installer
installer@192.168.158.134's password: jeoss
7- And we finally get the first Jeoss Install screen inviting us to select the desired install mode. For the purposes of this how-to we select normal mode.

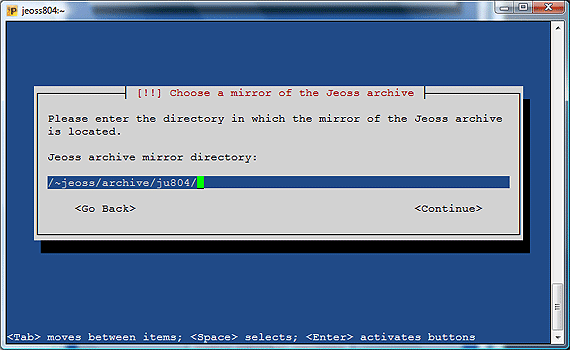
8- Now Jeoss install needs to know the name of the Jeoss Demo Internet repository.
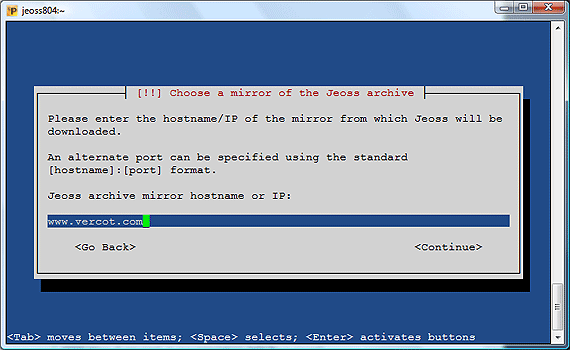
We will also be asked about the Directory in which the mirror of the Jeoss archive is located and the HTTP proxy if required; in our case taking defaults is correct.
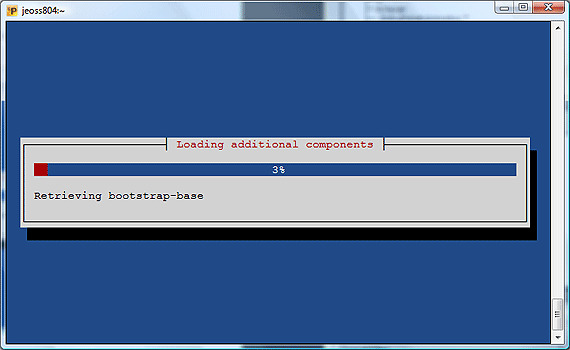
Be patient; the install now will perform a lot of network transactions many of them associated with timeouts that have to operate before continuing.
9- This screen tell us when Jeoss Demo Install commenced to retrieve components from Jeoss Demo on-line repository.
10- From this moment the Jeoos Demo Install will behave as a regular CD-Delivery install but just retrieving its components from the on-line repository.