PXE/BINL - AN01.2: Windows Network Install - RIS OSs
Starting an automated network install of anything from Windows 2000 to Windows 10 taking no more than 15 minutes and a ~4 MB download.
The objective of this document is to show you how to perform simple network installations of Microsoft's RIS OSs (XP, Server 2003) neither requiring to follow cryptic procedures nor being dependant on Microsoft’s RIS suite.
Procedures described in this document do not require Serva "Pro"
Serva PXE/BINL - Application Note Set
PXE/BINL - AN01: Windows Network Install - Basis
PXE/BINL - AN01.1: Windows Network Install - WDS OSs
PXE/BINL - AN01.2: Windows Network Install - RIS OSs
PXE/BINL - AN02: Windows Network Install (Adv) & WinPE Boot
PXE/BINL - AN03: Non-Windows Network Boot/Install
PXE/BINL - AN04: Custom menu
PXE/BINL - AN05: Windows Network Image Capture & Deploy
PXE/BINL - AN06: Windows Network Image Capture & Deploy on ARM
0 Index
1 Deployment
In this chapter we explore Serva's capabilities installing RIS OSs (XP, Server 2003) as an extension of the concepts initially developed on PXE/BINL - AN01: Windows Install - Basis
1.1 Serva has been tested installing the following WDS OS distributions:
Windows 2000 - Professional/Server/Advanced Server/Datacenter Server
Windows XP - Home/Tablet PC/Media Center/Professional/Professional (x86/x64)
Windows Server 2003 - Standard/Enterprise/Datacenter/Web (x86/64)
1.2- Creating MS Network Share.
While the initial net install stages use TFTP for transferring the required components there's a moment when the install process requires accessing the rest of files by using the services of a Microsoft network share. RIS and WDS OSs require different type of share (remember they both -RIS & WDS- belong to different generations of software).
1.2.1 ![]() When installing RIS OS's WIA_RIS' parent directory which is also the TFTP Server Root directory (C:\SERVA_REPO\ in our example) has to be shared as WIA_RIS_SHARE using a read-only "Null Session Share". Please consider this will (by default) expose to "ANONYMOUS LOGON" users, WIA_WDS' content. This probably unwanted side effect can be mitigated by editing \WIA_WDS default sharing permits after WIA_RIS_SHARE is created.
When installing RIS OS's WIA_RIS' parent directory which is also the TFTP Server Root directory (C:\SERVA_REPO\ in our example) has to be shared as WIA_RIS_SHARE using a read-only "Null Session Share". Please consider this will (by default) expose to "ANONYMOUS LOGON" users, WIA_WDS' content. This probably unwanted side effect can be mitigated by editing \WIA_WDS default sharing permits after WIA_RIS_SHARE is created.
This particular RIS sharing requirement
might look a bit awkward but please remember RIS was Microsoft first attempt on network installations; therefore there are some RIS hard-coded parameters that make this technology not easily ready for a multi-OS network install system like Serva.
| Warning |
|---|
|
| Note |
|---|
| Please create only the shares you need. i.e. if you are not installing RIS OSs (XP, Server 2003) then you should not create WIA_RIS_SHARE. |
1.3- Populating Serva's WIA_RIS class directories.
It is time now to populate WIA_RIS class directory with the content taken from
the Windows Installation Distributions (WIDs) corresponding to the OSs that we are planning to offer for network install.
Please consider:
a) WIA_RIS will hold only Windows 2000, XP, and Server 2003 distributions (32/64).
b) Every distribution has to be copied in full under its own manually created "head" directory exactly as it comes from the Microsoft distribution media.
c) While "head" directory names do not really matter they can only contain ASCII characters with no spaces.
When we finish creating the head directories and copying our Windows distributions into them we might have gotten something like this:
Serva repository structure (only win_xp_32 head directory is shown populated)
Where i.e. win_xp_32, win_7_32, S2012_64, etc, are the user created head directories and,
win_xp_32 holds the files and directory structure identically copied from a Win XP 32Bit install CD,
win_7_32
holds the files and directory structure identically copied from a Win 7 32Bit install DVD,
S2012_R2_64 holds the files and directory structure identically copied from a Win Server 2012 R2 install ISO, etc, etc...
| Additional steps for 64-Bit RIS OSs |
|---|
|
1.4- Quit and restart Serva.
At this point, after quitting and restarting Serva, we will see most of BINL's "preparation" processes in full action. The Log window (default on Serva init) will show all this activity where every Windows Install Distribution (WID) is basically converted into a Serva Windows Installation Asset (WIA). Every WID conversion usually takes no more than a few seconds (see Performance).
On the following Serva quit and restart cycles, BINL on init, will mostly perform quicker "maintenance" procedures of the already processed installation assets.
A quick way to find errors on the Log pane is holding depressed [CTRL]
while going up/down with your keyboard arrows or mouse wheel. Alternative holding depressed [CTRL]+[Shift] while going up/down will keep selected all the error lines found.
| Note |
|---|
| When Serva processes an Installation Asset it creates and populates the directory _SERVA_ under its head directory. If for any reason we want to force the re-process of a particular asset we just need to erase its _SERVA_ directory an restart Serva. |
1.5- Booting a PXE Client.
If there were no errors in the former step (see the Log pane) it is now time to boot our first PXE client. We should quickly see one of the three possible Serva multi-OS PXE Boot/Install Menu:
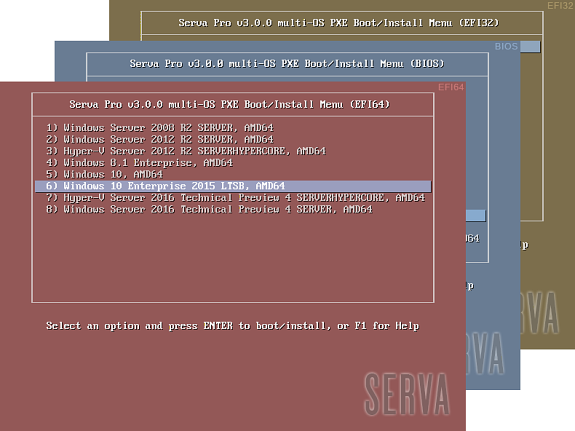
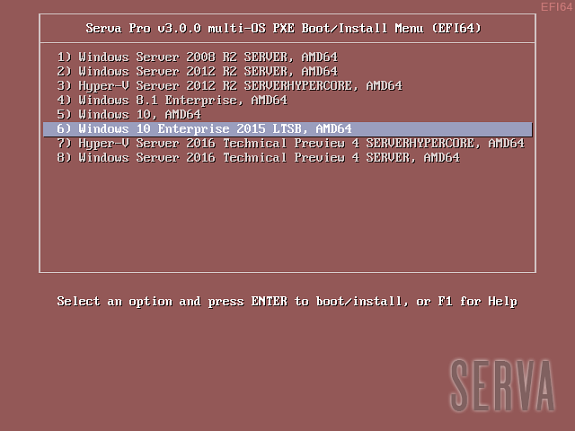
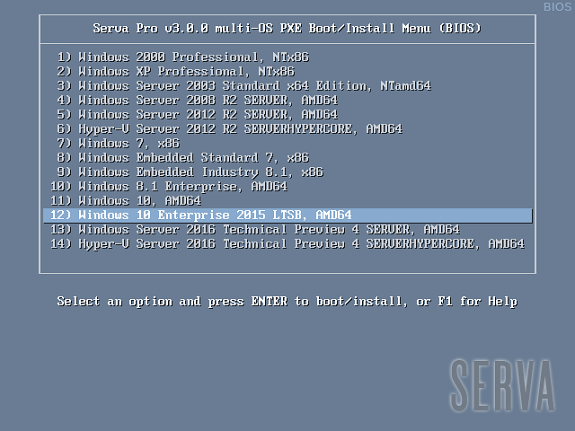
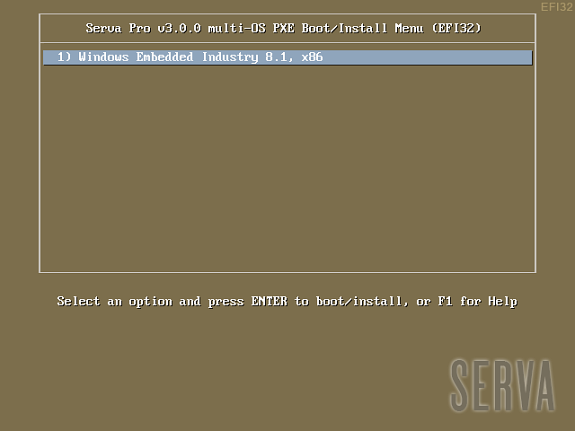
Fig 1: Serva Multi-OS PXE Boot/Install EFI64/BIOS/EFI32 Menus
The Fig 1 shows the menu that a generic PXE client, depending on its pre-boot environment, will display as soon as it boots-up. From this point we just select the desired OS and hit [Enter] to install it from the net. Of course the displayed menu entries correspond to the OS distributions that were conveniently copied under WIA_RIS and WIA_WDS class directories.
WDS OSs sometimes contain more than one OS flavor within the same distribution. On these cases Serva uses a simple algorithm displaying as menu entry name the longest character string common to all the included OS flavor names. i.e. Windows 8 DVD includes flavors “Windows 8” and “Windows 8 Pro”. Serva will take “Windows 8” as the displayed menu entry name. Of course despite the displayed menu entry name the user is always able to select the flavor to be installed in a further step; sometimes by the use of a flavor selecting menu (i.e. Windows Vista), sometimes automatically selected upon the user provided license key (i.e. Windows 8). Menu entry names are finished by indicating the distribution included architecture/s (x86, AMD64, etc.).
Customizing menu items implies manual editing of the corresponding menu definition file (please see Customization).
| Notes |
|---|
|
1.6- Logging to Serva's WIA repository.
As we have said before RIS OSs use a "Null Session Share" (WIA_RIS_SHARE) for accessing their install components, then a transparent (no user input required) anonymous login is all it takes for completing a RIS OS installation.
2 Customization
2.1- Serva Menu
Serva menu can be user customized but only "Serva Pro" includes the engine able to of keep those user customizations when Serva needs to re-create its menu. For more information see Serva PXE/BINL - AN04: Custom menu.
2.2- Serva Help
Serva multi-OS PXE Install Menu includes a Help system (template) that can be easily customized editing
C:\SERVA_REPO\BM\PXESERVA\BIOS\pxeserva.cfg\F1
C:\SERVA_REPO\BM\PXESERVA\EFI64\pxeserva.cfg\F1
C:\SERVA_REPO\BM\PXESERVA\EFI32\pxeserva.cfg\F1
following the PXESERVA text file rules or by using this handy graphic utility IsoLinuxMate_1.0.1
2.3- Serva Windows Assets
All the Windows Install Distributions (Retail, MSDN, etc) install a Windows OS containing the set of features and applications defined by Microsoft at design time. There are situations when users might want to customize the install process in order to get copied/installed i.e. new applications, new files, probably trigger some new functionality, etc.
2.3.1- RIS Windows Install Distributions
Customizing the old RIS distributions required third party applications (i.e. nLite) but they usually failed producing PXE compatible systems. The official way was just recreating the distribution using the corresponding Microsoft's OS OEM Preinstallation Kit (“OPK”).
3 Security
Network installations of Microsoft's OSs are usually performed on non-hostile environments (or at least behind a firewall and/or NAT device). Nonetheless, a brief Serva PXE/BINL security assessment will help users deploy network install environments with the highest possible level of security.
3.1- Serva's BINL net offered file resources associated risks
3.1.1- TFTP
Serva's TFTP root directory (i.e. C:\SERVA_REPO) is the heart of Serva's PXE/BINL strategy. This means absolutely all the files we add under this directory will be potentially available for download using a TFTP client if the "attacker" knows the full TFTP path and filename.
This should not represent a security breach considering TFTP has not file browsing capabilities and Windows installation distributions do not really contain security-sensitive information. Users installing customized or unattended versions of Microsoft OSs could potentially expose their embedded license keys.
Serva TFTP service should always be set as "read-only" (default) when used with BINL; this way a potential "attacker" will not be able to overwrite BINL file structure using a TFTP client.
3.1.2- WIA_RIS_SHARE Microsoft Network Share
It is very similar to point 3.1.1 with the difference that a read-only "Null Session Share" can be easily mapped and browsed.
3.2- Serva's BINL net offered install services associated risks
The PXE/BINL install services are accessed by Serva Multi-OS PXE Boot/Install Menus. If required its definition files
C:\SERVA_REPO\BM\PXESERVA\BIOS\pxeserva.cfg\menu.def
C:\SERVA_REPO\BM\PXESERVA\EFI64\pxeserva.cfg\menu.def
C:\SERVA_REPO\BM\PXESERVA\EFI32\pxeserva.cfg\menu.def
can be manually “customized” adding password protection to menu entries.
i.e. considering
C:\SERVA_REPO\BM\PXESERVA\BIOS\pxeserva.cfg\menu.def
a) Serva automatically created "Windows XP ProfessionalP" menu entry for BIOS targets
LABEL WIA_RIS\Win_XP_32\
 menu label  ^  2) Windows XP Professional, NTx86
 kernel      pxechn.c32
 append      ::WIA_RIS\Win_XP_32\_SERVA_\startrom.n12
b) Manually customized (now password protected) "Windows 10" menu entry for EFI64 targets
LABEL WIA_RIS\Win_XP_32\
 menu label  ^  2) Windows XP Professional, NTx86
 menu passwd $5$2T5Bidc2$.BbmhroqhplGQZhqv9WAUGMiiWb5XDG6rSHbM2FCli3$
 kernel      pxechn.c32
 append      ::WIA_RIS\Win_XP_32\_SERVA_\startrom.n12
Where the highlighted string of characters is in this case a SHA2.256 cryptographic hash (digital fingerprint) of the chosen menu entry password or pass-phrase. A valid hash has to be obtained following the ISOLINUX MD5/SHA1/SHA2.256/SHA2.512 conventions and this can be done i.e. by using the following hash calculator.
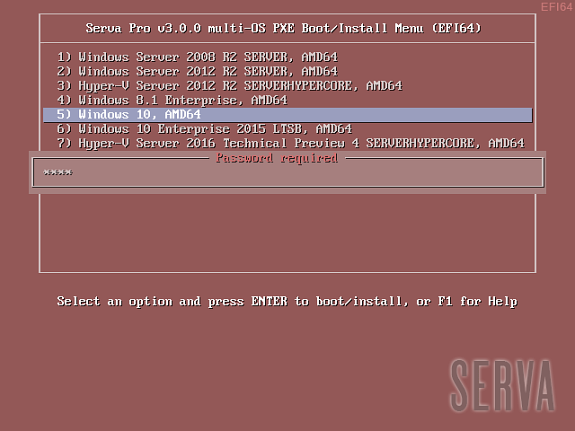
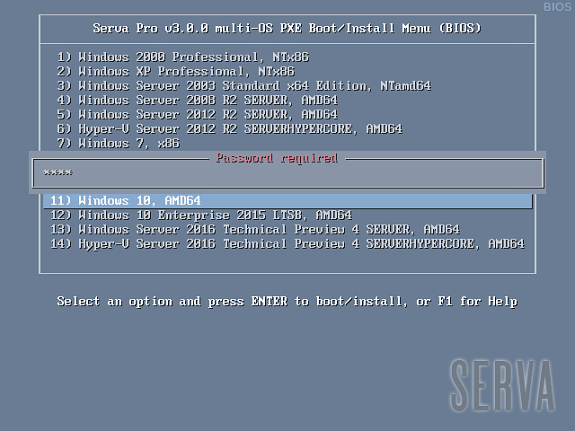
Fig 2: Password protected menu entries
| Warning |
|---|
| Even when the calculated hash uses a randomly generated "salt" which makes password recovery from its hash very difficult all the good practices for password selection still apply. |
4 Performance
Serva PXE/BINL has two distinctive mutually exclusive working phases:
- BINL Preparation/Maintenance
- PXE/BINL Server
7.1- On the first stage we mainly convert every Windows Install Distribution into Windows Installation Assets. This is a local task mostly involving file manipulation. The time consumed on this preparation stage is directly linked to the amount of assets on Serva's repository.
i.e. Preparation of:
| Windows 10 Enterprise ltsb 64Bit | ||
| Windows 8 Enterprise 64Bit | ||
| Windows Server 2003 64Bit |
These figures were obtained with Serva running on:
- Windows 7 PC, Intel Core 2 duo @ 2.2 GHz, 4GB RAM, HDD.
- Windows 8.1 PC, Intel i7 3630QM @ 2.40GHz, 16GB RAM, SSD.
At December 2020 modern hardware produces even faster figures.
Maintenance times on the other hand (if they do not involve the re-creation of the driver database on RIS OSs nor ServaBoot.wim on WDS OSs) are much shorter but you should know there are certain actions that force the maintenance of the "whole" Serva repository:
- Changing the Repository root directory (in our example SERVA_REPO)
- Changing Serva PC name
- When required on certain Serva upgrades
7.2- When the BINL Preparation/Maintenance stage finishes the PXE/BINL Server stage begins its job until Serva is manually closed. Performance at this point is mainly driven by Serva's host capabilities and it is virtually unaffected by Serva's repository size.
5 Troubleshooting
5.1- Serva general troubleshooting topics.
See here.
5.2- Troubleshooting Network card PXE/PXESERVA/PXELINUX compatibility
There are rare occasions where certain cards present PXE/PXESERVA/PXELINUX compatibility issues right after boot-up. Please be sure you have installed the latest available firmware for your motherboard and network card.
5.3- Troubleshooting Network driver issues.
On init a PXE client relies on its NIC's firmware providing a TCP/IP stack and DHCP+TFTP client capabilities. Of course all these services run on top of a network driver also included on NIC's firmware. But there's a point on the network install process where the previous network stack is replaced by one provided by the OS being installed (RIS). At this point we can be informed that a required network driver is not available or that it failed doing its job. This is probably the most common error we might come across on a Microsoft OS network install.
5.3.1- RIS OS OEM network drivers
When the RIS OS we are network installing does not include a RIS network driver that matches our PXE client NIC we get an error message like this:
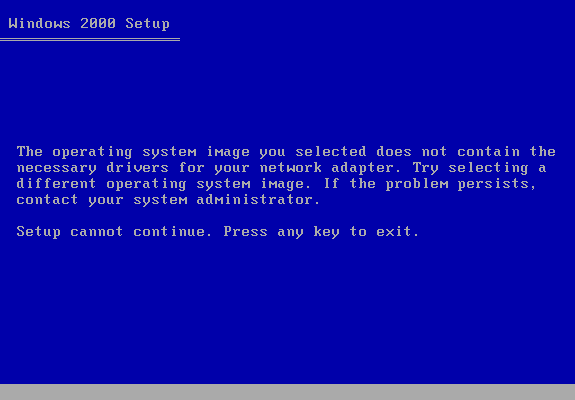
Fig 3: RIS, Missing Net driver error
Fig 3 shows the error displayed at client's screen, at the same time we can see a BINL net protocol transaction error logged on Serva's BINL and Log panels indicating "Net driver not found".
On rare occasions, even when the BINL net protocol transaction correctly provides the requested driver, the driver code, for some reason, fails when running at the client. On these situations while Serva will not show any logged error, the error message at client's screen could even be as cryptic as this one:
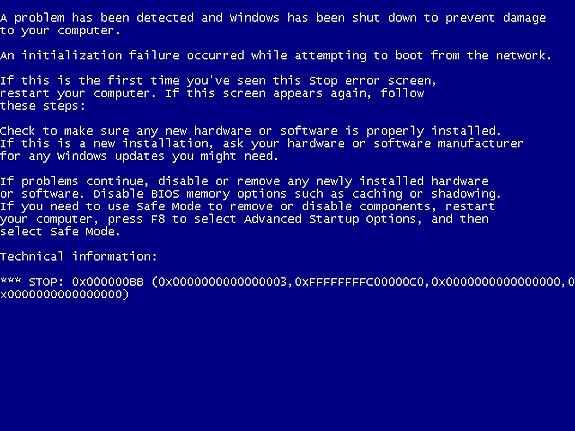
Fig 4: RIS, Not common Net driver failure
To circumvent these situations we can add up-to-date versions of the required OEM RIS capable network driver/s to the corresponding RIS WIA, under the directory i.e.
C:\SERVA_REPO\WIA_RIS\win2000P\$OEM$\$1\Drivers\NIC\
The required files would be i.e. NetDriverX.inf, NetDriverY.sys, and NetDriverY.cat (if available). Please consider some OEM drivers might require the inclusion of some other additional files contained within the driver package. Always read the OEM driver documentation for details.
The \NIC is a directory that is parsed twice; by Serva first and later-on by the OS install process itself. Serva only looks after "Net" class drivers in order to create the network driver database used by the the initial text phase of the install process. Serva completely ignores sub-directory content and other driver classes like i.e. "Storage" class drivers.
To identify the NIC and then get its matching driver we can rely on manufacturer specifications or look for the network card VEN/DEV (Vendor/Device) identifiers on the corresponding failed BINL transaction displayed on Serva's BINL Log.
In some circumstances, the driver packages available from the OEM include an installation program, but not any instructions on how to get their basic file components. While this represents a bit of a challenge the task can be certainly done.
Please consider that:
a) Some driver files are named differently depending on the operating system to which they apply; driver_w2k.sys, driver_w2k3.sys, and driver_w2k3_64.sys, for example, might apply to Windows® 2000, Windows Server 2003, and Windows Server 2003 64-bit.
b) The installation program might rename the files to base names before installing the driver, such as a generic driver.sys. If this is your case manual editing of NetDriverX.inf will be required.
| Notes |
|---|
|
5.3.2- Virtual Environments Network Driver Errors
When a virtual machine is created on virtual environments like i.e. VMware, we have to specify the target OS. If we indicate the wrong OS or the wrong platform (32/64bits) the virtual environment will emulate a NIC that probably does not have a matching net driver within the target OS. On these situations the remedy is not adding missing drivers but just creating the virtual machine declaring the right target OS.
5.4- Troubleshooting Network Share issues.
5.4.1- RIS OSs Null Session Share
Installing RIS OSs always requires the creation of a Null Session Share as described in
1.2. When this share is not correctly set we will get stuck on a screen like:
Fig 5: Installing Windows XP/ Server 2003; process stopped.
When your RIS Windows XP or Windows Server 2003 install process gets stopped on a screen like Figure 13 the chances are your Null Session Share is not properly configured. Windows 2000 also displays a similar waiting screen when experiencing similar problems. See here for help on how to set up Null Session Shares.
5.4.2- RIS OSs PROCESS1_INITIALIZATION_FAILED BSOD (Blue Screen of Death).
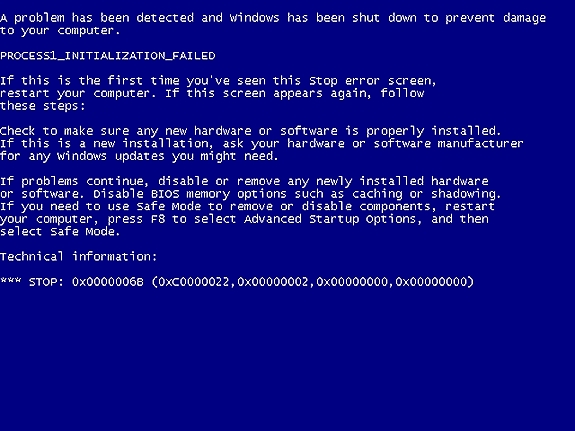
Fig 6: RIS, NSS WIA_RIS_SHARE pointing to the wrong directory
While the BSOD is displayed at the booting client Serva's log will look like:
...
[06/25 08:18:07.753] TFTP Inf: Read file <\WIA_RIS\Win_XP_32\i386\rdbss.sy_>. Mode octet
[06/25 08:18:07.941] TFTP Inf: <\WIA_RIS\Win_XP_32\i386\rdbss.sy_>: sent blks=60 blkSz=1432, Total 85616 bytes in 0s, err recovery=0
[06/25 08:18:07.941] TFTP Inf: Read file <\WIA_RIS\Win_XP_32\i386\mup.sy_>. Mode octet
[06/25 08:18:08.097] TFTP Inf: <\WIA_RIS\Win_XP_32\i386\mup.sy_>: sent blks=37 blkSz=1432, Total 51722 bytes in 1s, err recovery=0
[06/25 08:18:08.097] TFTP Inf: Read file <\WIA_RIS\Win_XP_32\i386\mrxsmb.sy_>. Mode octet
[06/25 08:18:08.362] TFTP Inf: <\WIA_RIS\Win_XP_32\i386\mrxsmb.sy_>: sent blks=154 blkSz=1432, Total 219887 bytes in 0s, err recovery=0

-^- stops here after correctly transferring mrxsmb.sy_
You get this error when the correctly created Null Session Share WIA_RIS_SHARE is wrongly pointing at i.e. C:\SERVA_REPO\WIA_RIS when it should have been pointing at C:\SERVA_REPO instead. Please re-read 1.2 When installing RIS OS's.
5.5- Troubleshooting DHCP configuration issues.
5.5.1- RIS OSs proxyDHCP requirement
RIS clients expect getting their BINL server IP from a PXE/BINL transaction carried out on port 4011. Serva provides those transactions when its DHCP service is set to proxyDHCP mode. Then when installing RIS OSs remember choosing proxyDHCP on Serva's DHCP configuration tab.
Failing to do this will lead to RIS OS installations that are interrupted just before the BINL NIC request takes place. Once the installation gets stopped and after a long delay a somehow misleading Missing Network Driver Error (like the one at Fig 10) will be displayed.
...
[03:48:46.843] TFTP Inf: Read file <\WIA_RIS\XP_32\i386\migrate.in_>. Mode octet
[03:48:46.884] TFTP Err: File <WIA_RIS\XP_32\i386\migrate.in_> : error 2 in CreateFile; The system cannot find the file specified.
[03:48:46.889] TFTP Inf: Read file <\WIA_RIS\XP_32\i386\migrate.inf>. Mode octet
[03:48:46.891] TFTP Err: File <WIA_RIS\XP_32\i386\migrate.inf> : error 2 in CreateFile; The system cannot find the file specified.
[03:48:46.896] TFTP Inf: Read file <\WIA_RIS\XP_32\i386\unsupdrv.in_>. Mode octet
[03:48:46.898] TFTP Err: File <WIA_RIS\XP_32\i386\unsupdrv.in_> : error 2 in CreateFile; The system cannot find the file specified.
[03:48:46.904] TFTP Inf: Read file <\WIA_RIS\XP_32\i386\unsupdrv.inf>. Mode octet
[03:48:46.906] TFTP Err: File <WIA_RIS\XP_32\i386\unsupdrv.inf> : error 2 in CreateFile; The system cannot find the file specified.

-^- stops here, long delay, then a Missing Network Driver Error (Fig 10) will be displayed.
5.6- Troubleshooting saving Serva settings (Serva.ini) issues.
Serva requires full read/write permissions on its running directory in order to keep updated its configuration file Serva.ini. If for any reason Serva has not the right permissions it will fail and refuse to continue. Please consider for some special running directories, on some particular MS OSs, only an Admin account would be able to grant Serva.ini the required permissions.
if you are joined to a domain permissions might be inadvertently limited even if you are an Admin; in this case selecting properties to full control manually solves the problem.
5.7- Troubleshooting TFTP issues.
8.7.1- Errors that are not really Errors.
TFTP is a file transfer protocol that does not have special provisions for telling the client in advance the size of a file the client is planning to retrieve. The client sometimes needs this information for control or memory allocation purposes, then you will see this kind of log sequence:
[1] TFTP Inf: Read file <\WIA_WDS\w8_32\_SERVA_\boot\bcd>. Mode octet
[2] TFTP Err: Peer returns ERROR <TFTP Aborted> -> aborting transfer
[3] TFTP Inf: Read file <\WIA_WDS\w8_32\_SERVA_\boot\bcd>. Mode octet
[4] TFTP Inf: <WIA_WDS\w8_32\_SERVA_\boot\bcd\>: sent blks=9 blkSz=1456,
        Total 12288 bytes in 0s, err recovery=0
In this particular case:
- The client requests the bcd file.
- The client quickly aborts the transfer, but it received the bcd file size from the first packet transmitted by the purposely stopped transfer.
- The client verifies the bcd file size is within the expected values and if everything is OK it requests a new transfer.
- This time the transfer is completed.
This type of sequence (even when there's an error involved) does not represent anything you have to be worried about.
5.7.2- Serva's PC wrong MTU (Maximum Transmission Unit)
TFTP transfers are UDP based; originally they were limited to 512 byte blocks. Improvements in the protocol brought by RFC 2348 allow client and server to negotiate bigger block sizes what leads to faster transfers.
In order to avoid packet fragmentation a TFTP client will usually negotiate a block size around but not higher than 1468 bytes. The last figure equals the
Ethernet MTU (1500 bytes) minus the headers of TFTP (4 bytes), UDP (8 bytes) and IP (20 bytes).
If the PC running Serva for some reason limits the MTU to a value smaller than its default (1500) you will probably see logs like this:
...
[08/20 18:38:40.197] TFTP Inf: Read file <pxeserva.0>. Mode octet
[08/20 18:38:41.298] TFTP Err: timeout waiting for ack blk 16#1    #1
[08/20 18:38:43.301] TFTP Err: timeout waiting for ack blk 16#1    #1
[08/20 18:38:46.302] TFTP Err: timeout waiting for ack blk 16#1    #1
[08/20 18:38:49.302] TFTP Err: timeout waiting for ack blk 16#1    #1
[08/20 18:38:52.303] TFTP Err: timeout waiting for ack blk 16#1    #1
[08/20 18:38:55.303] TFTP Err: timeout waiting for ack blk 16#1    #1
[08/20 18:38:55.303] TFTP Err: TIMEOUT & abort waiting for Ack block #1

-^- stops here.
In this case (if your firewall is not blocking TFTP traffic) the chances are the TFTP IP packets are being fragmented. Most PXE clients will not be able to deal with this situation. To solve this problem just restore Serva's PC MTU to its default value (1500).
5.8- Troubleshooting "Initial menu has no label entries" displayed at the client.
Basically the PXE/BINL service works by you copying your Windows distribution components under some “head” directory under WIA_RIS\ or WIA_WDS\. Then Serva BINL processes all those "head" directories making a Serva “asset” out of everyone of them. Finally at the booting client every Serva asset is accessed by a menu entry on Serva’s automatically created menu.
But, what if the Windows distribution components that you just added do not really conform a standard (Retail, MSDN, etc) Windows distribution? Probably they present a heavily customized file/directory structure unknown to Serva's BINL. In that case Serva’s BINL layer will not be able to do its job properly and it will not create the corresponding Serva asset out of them.
If Serva was unable to parse a single valid asset you will get "Initial menu has no label entries" when booting your client. Just use the right Windows distributions and you will not have this problem.
9 Final words
Initially targeting the sysadmin in a hurry and the average IT enthusiast, Serva PXE/BINL was originally designed as the simple alternative to the server functionality of that fantastic piece of software called Microsoft RIS . Today Serva's reliability, mild learning curve, and affordable cost make it the option of choice for business, military and industrial environments. See our customers here.
When Serva PXE/BINL services are enabled, "Community" builds of Serva stop processing network requests after 50 minutes of use. This amount of time is more than enough for any OS installation. "Professional" builds of Serva on the other hand do not have this limit.
If you are a Serva Community user and you find it useful please consider purchasing Serva Pro. Non-personal or commercial use of Serva always requires a Serva Pro license (see Serva's download page for further details).
Serva bugs, comments, or ideas on how to improve the information contained in this document please contact us here.
| Updated | 10/20/2020 |
| Originally published | 05/08/2012 |